Need help in the process of creating your own WordPress theme?
The shortcodes extension makes possible the easy creation of WordPress Shortcodes and their integration with the framework’s layout builder.
A shortcode can be created in the following places:
framework-customizations/theme/shortcodes/{some-extension}/shortcodes/{shortcode-name}/
├─class-fw-shortcode-{shortcode-name}.php # optional
├─config.php
├─options.php # optional
├─static/ # optional
│ ├─css/
│ │ ├─auto-enqueued-style.css
│ │ └─...
│ ├─img/
│ │ ├─layout_builder.png
│ │ └─...
│ └─js/
│ ├─auto-enqueued-script.js
│ └─...
└─views/
├─view.php
└─...
The framework will register a new WordPress shortcode with its tag being the shortcode directory name,
with hyphens replaced by underscores ([shortcode_name] for the above example).
The shortcode configuration is a file named config.php placed inside the root directory of the shortcode.
It contains an array that must be stored in a $cfg variable:
$cfg = array(
    'layout_builder' => array(
        'title'         => __('Demo Shortcode', 'fw'),
        'description'   => __('Demo shortcode description', 'fw'),
        'tab'           => __('Demo Elements', 'fw'),
        'popup_size'    => 'small' // can be 'large', 'medium' or 'small'
    )
);
For the shortcode to appear in the layout builder, the config array contains a special layout_builder key that holds an array with the following data:
title - the title that will appear in the shortcode box.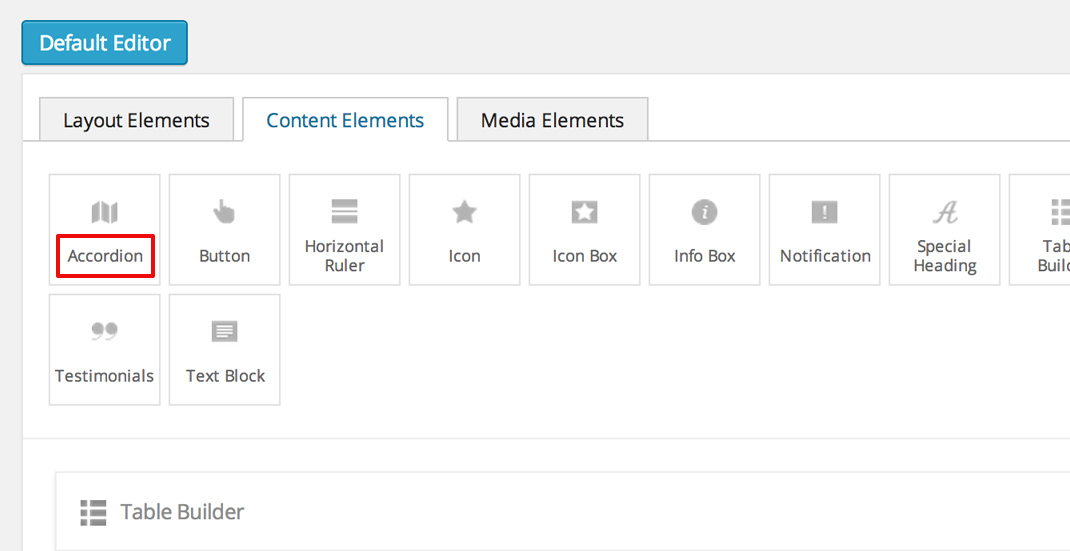
description - the text that will be shown in a tooltip when hovering the shortcode box.
tab - the builder tab in which the shortcode box will appear.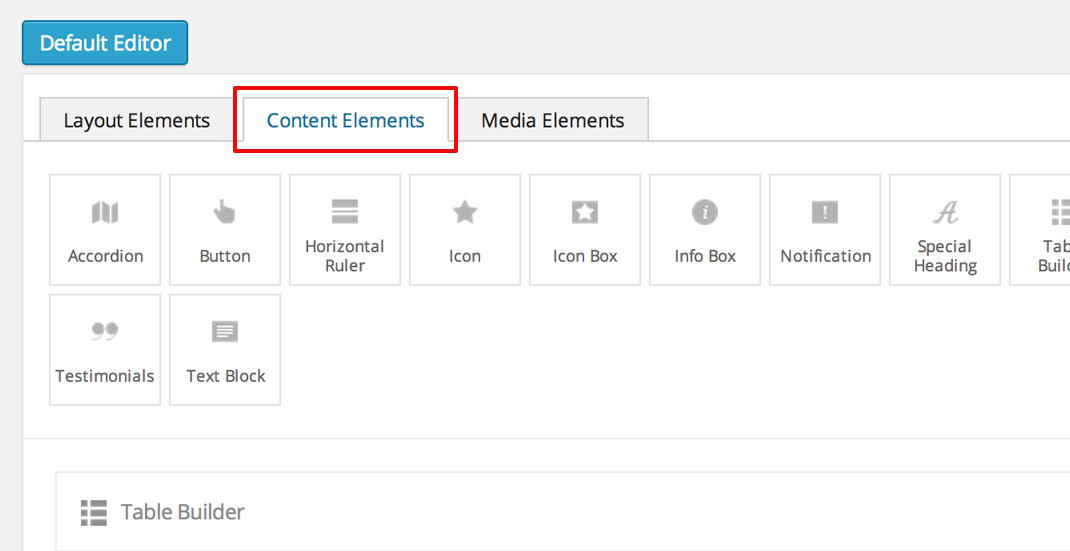
popup_size - the size of the popup in which the shortcode options will be displayed.
Allowed values are
large | medium | small. This parameter is optional and the default is set tomedium.
To set an icon for the shortcode box, put an image named layout_builder.png inside {your-shortcode}/static/img/ directory.
The image should have the size of 16x16 px.
![]()
The shortcode directory can contain a file named options.php with correctly formed options:
$options = array(
    'demo_text'   => array(
        'label'   => __('Demo text label', 'fw'),
        'desc'    => __('Demo text description', 'fw'),
        'help'    => __('Demo text help', 'fw'),
        'type'    => 'text'
    ),
    'demo_select' => array(
        'label'   => __('Demo select label', 'fw'),
        'desc'    => __('Demo select description', 'fw'),
        'type'    => 'select',
        'choices' => array(
            'c1'  => __('Choice 1', 'fw'),
            'c2'  => __('Choice 2', 'fw'),
            'c3'  => __('Choice 3', 'fw')
        ),
        'value'   => 'c2'
    )
);
If it does, then it will have an icon when dragged into the builder’s canvas area, indicating that the shortcode can be edited:
![]()
When clicking either the edit icon or the shortcode itself, a modal window will open containing the declared options:
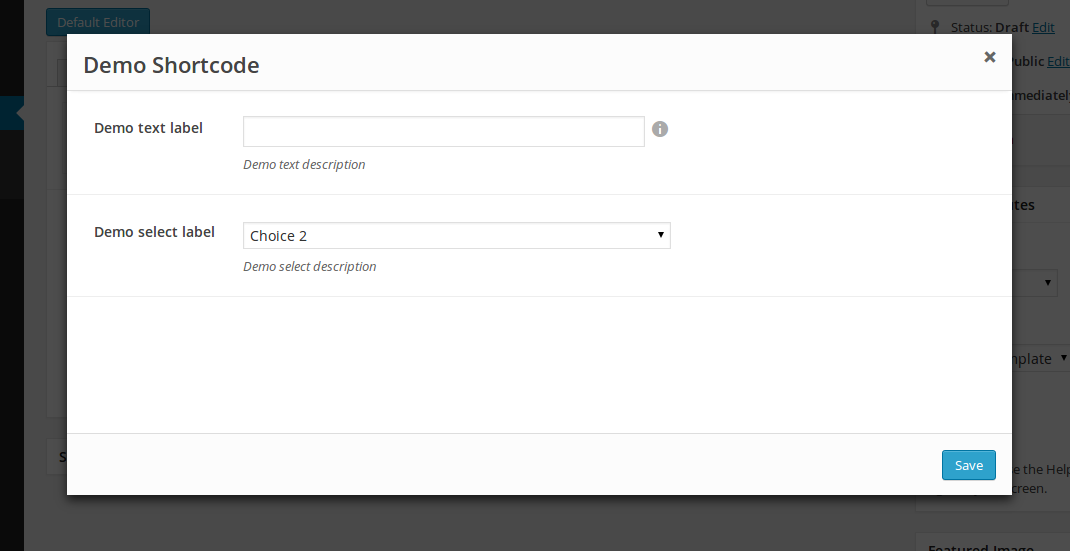
The saved options values will be passed into the view file.
By default, when WordPress wants to render a shortcode built into the framework, it will serve the html from the default view file located in {your-shortcode}/views/view.php.
3 variables are passes into the view file : $atts, $content and $tag.
Tip
More information can be found in the cookbook section.
When rendering the default view, the framework will enqueue
all css files from {your-shortcode}/static/css/ and
all js files from {your-shortcode}/static/js/ directories in alphabetical order.
Note
Files from subdirectories inside both {your-shortcode}/static/css/ and {your-shortcode}/static/js/ will not be enqueued by default.
Check out the cookbook section for tips on how to do that.
Attention
All of the above is valid only in the case that the handle_shortcode() method from the class file was not overriden.
When creating a shortcode folder with all the required files, the framework makes an instance of FW_Shortcode to ensure the correct default functionality.
However, some of that default functionality can be overridden by creating a class in the shortcode directory that extends FW_Shortcode.
Note
The class file must respect the following naming convention: class-fw-shortcode-{your-shortcode-folder-name}.php.
The class inside the class file must respect the following naming convention: FW_Shortcode_{Your_Shortcode_Folder_Name}.
Replace the hyphens with underscores in the class name.
Note
The framework replaces hyphens with underscores when registering the shortcode, so your-shortcode will be transformed to [your_shortcode].
So in order to create a class for the [demo_shortcode] shortcode, we need to create a file demo-shortcode/class-fw-shortcode-demo-shortcode.php
and within the file create a class that extends FW_Shortcode:
class FW_Shortcode_Demo_Shortcode extends FW_Shortcode
{
    // ...
}
The new class inherits some usefull methods like:
get_tag() - returns the shortcode’s tag.get_path() - returns the path to the shortcode folder. Useful for loading views or checking if files exist.get_uri() - returns the uri to the shortcode folder. Useful for enqueuing styles and scripts, or forming the src attribute of an <img> tag for an image from static/img/.get_config($key = null) - returns the shortcode’s whole config array, or just a specified key value.get_options() - returns the shortcode’s options array, if there is any.The methods that are most prone to be overriden are:
_init() - is called when the FW_Shortcode instance for the shortcode is created. Useful for loading other php files (custom option types, libraries, etc.).handle_shortcode($atts, $content, $tag) - returns the html that will be displayed when the shortcode will be executed by WordPress. Useful for changing the default behavior with a custom one.Tip
More information about this can be found in the cookbook section.
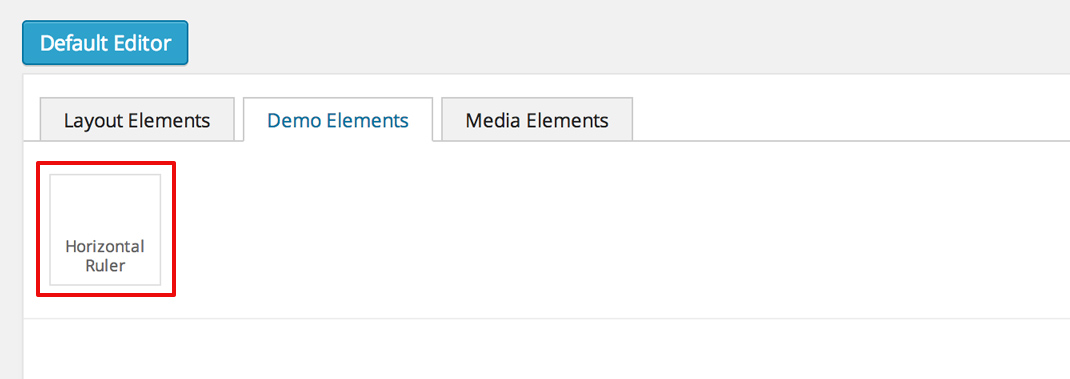
This example will go through creating the [hr] (horizontal ruler) shortcode in a few simple steps:
Create a hr folder in framework-customizations/theme/shortcodes/.
Create a config file inside framework-customizations/theme/shortcodes/:
<?php if (!defined('FW')) die('Forbidden');

$cfg = array(
    'layout_builder' => array(
        'title'       => __('Horizontal Ruler', 'fw'),
        'description' => __('Creates a \'hr\' html tag', 'fw'),
        'tab'         => __('Demo Elements', 'fw'),
    )
);
Note
At this point the shortcode should appear in the Demo Elements tab of the layout builder as shown bellow:
Tip
To add an icon to the shortcode see the icon section.
Create the view file in framework-customizations/theme/shortcodes/hr/views/:
<?php if (!defined('FW')) die('Forbidden'); ?>

<hr>
The [hr] shorcode is completed! The directory structure of the shortcode is as shown bellow:
framework-customizations/
└─theme/
  └─shortcodes/
    └─hr/
      ├─config.php
      └─views/
        └─view.php
This example will go through creating the [button] shortcode.
Create a button folder in framework-customizations/theme/shortcodes/
Create a config file inside framework-customizations/theme/button/:
<?php if (!defined('FW')) die('Forbidden');

$cfg = array(
    'layout_builder' => array(
        'title'         => __('Button', 'fw'),
        'description'   => __('Creates a button with choosable label, size and style', 'fw'),
        'tab'           => __('Demo Elements', 'fw'),
    )
);
Note
At this point the shortcode should appear in the Demo Elements tab of the layout builder as shown bellow:
Tip
To add an icon to the shortcode see the icon section.
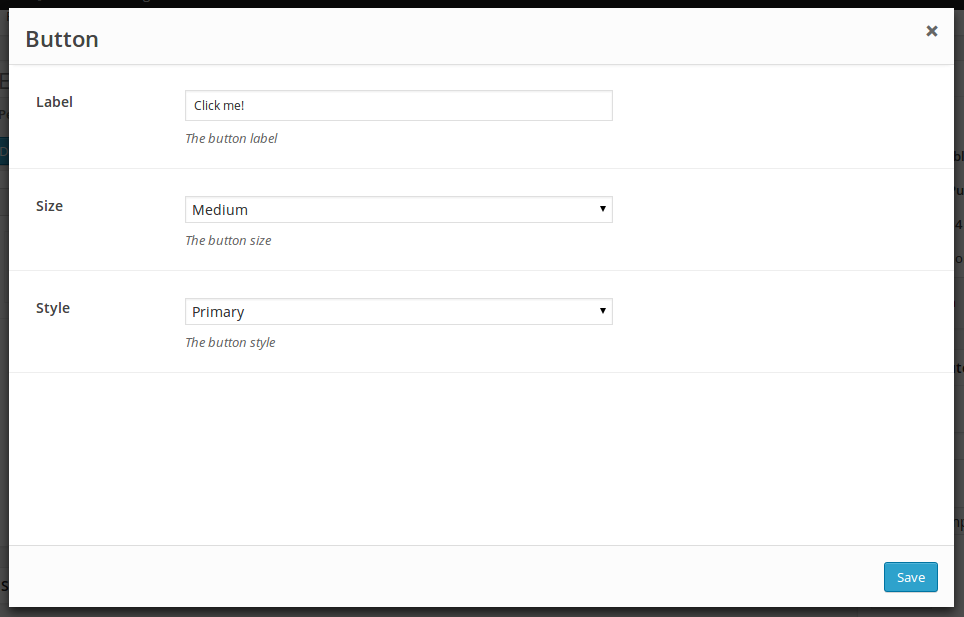
Create an options file inside framework-customizations/theme/shortcodes/button/ with the options for label, size and style:
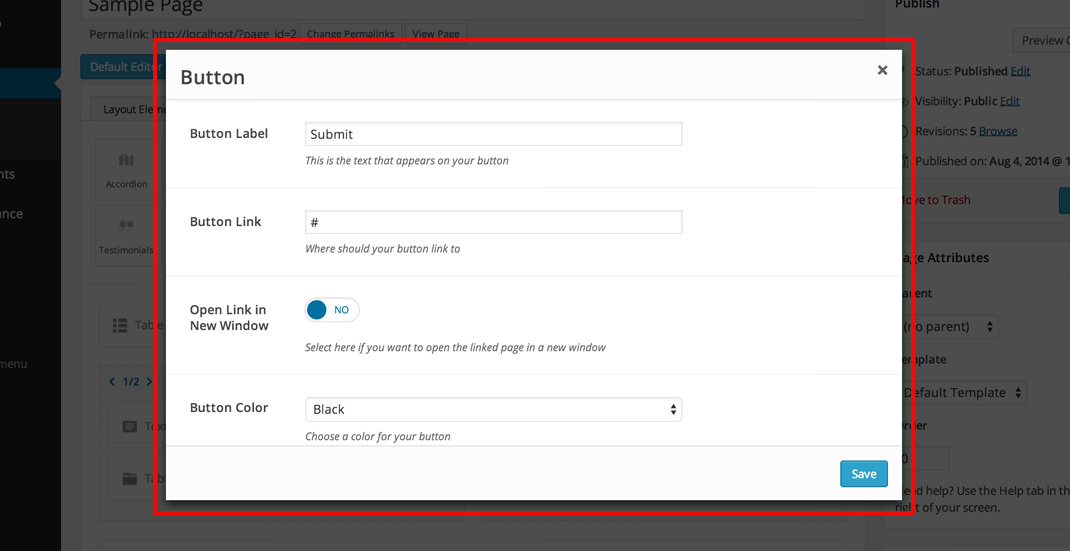
<?php if (!defined('FW')) die('Forbidden');

$options = array(
    'label' => array(
        'label'   => __('Label', 'fw'),
        'desc'    => __('The button label', 'fw'),
        'type'    => 'text',
        'value'   => __('Click me!', 'fw')
    ),
    'size' => array(
        'label'   => __('Size', 'fw'),
        'desc'    => __('The button size', 'fw'),
        'type'    => 'select',
        'choices' => array(
            'big'    => __('Big', 'fw'),
            'medium' => __('Medium', 'fw'),
            'small'  => __('Small', 'fw')
        ),
        'value'   => 'medium'
    ),
    'style' => array(
        'label'   => __('Style', 'fw'),
        'desc'    => __('The button style', 'fw'),
        'type'    => 'select',
        'choices' => array(
            'primary'   => __('Primary', 'fw'),
            'secondary' => __('Secondary', 'fw')
        )
    )
);
Now, when clicking the shortcode inside the canvas area of the layout builder a pop-up window containting the options will appear:
Create the view file in framework-customizations/theme/shortcodes/button/views/. Make use of the $atts variable that is avaialble inside the view, it contains all the options values that the user has selected in the pop-up:
<?php if (!defined('FW')) die('Forbidden'); ?>

<button class="button button-<?php echo $atts['size']; ?> button-<?php echo $atts['style']; ?>">
    <?php echo $atts['label']; ?>
</button>
Tip
For more information about the view variables check out the default view section.
The [button] shorcode is completed! The directory structure of the shortcode is as shown bellow:
framework-customizations/
└─theme/
  └─shortcodes/
    └─button/
      ├─config.php
      ├─options.php
      └─views/
        └─view.php
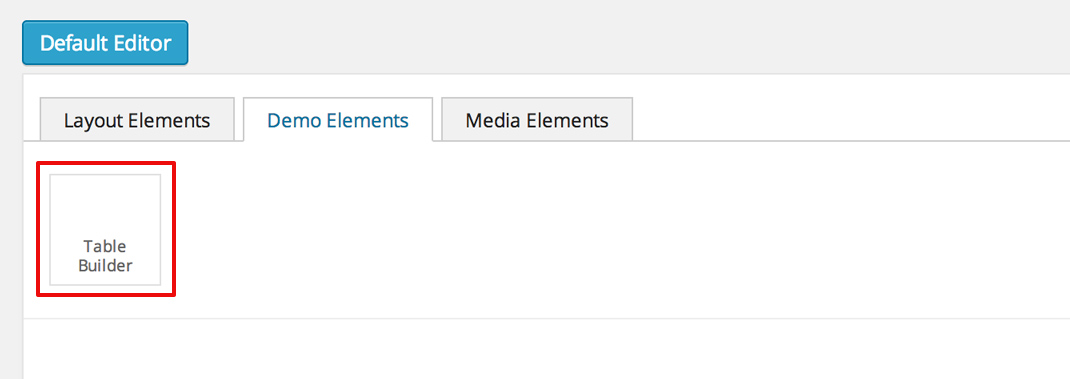
This ex will go through creating a [table_builder] shortcode, it will make use of it’s own custom option type:
Create a table-builder folder in framework-customizations/theme/shortcodes/.
Create a config file inside framework-customizations/theme/table-builder/:
<?php if (!defined('FW')) die('Forbidden');

$cfg = array(
    'layout_builder' => array(
        'title'       => __('Table Builder', 'fw'),
        'description' => __('Creates custom tables', 'fw'),
        'tab'         => __('Demo Elements', 'fw'),
        'popup_size'  => 'large'
    )
);
Note
At this point the shortcode should appear in the Demo Elements tab of the layout builder as shown bellow:
Tip
To add an icon to the shortcode see the icon section
A custom option type is needed for the shortcode to be created, because the ones that exist in the framework do not suit its needs.
Create a
table-builderoption type inframework-customizations/theme/shortcodes/table-builder/includes/fw-option-type-table-builder/Create a custom class for the shortcode and override the
_init()method, to load the custom option type class file.<?php if (!defined('FW')) die('Forbidden'); class FW_Shortcode_Table_Builder extends FW_Shortcode { /** * @internal */ public function _init() { if (is_admin()) { $this->load_option_type(); } } private function load_option_type() { require $this->get_path() . '/includes/fw-option-type-table-builder/class-fw-option-type-table-builder.php'; } // ... }Create an options file inside
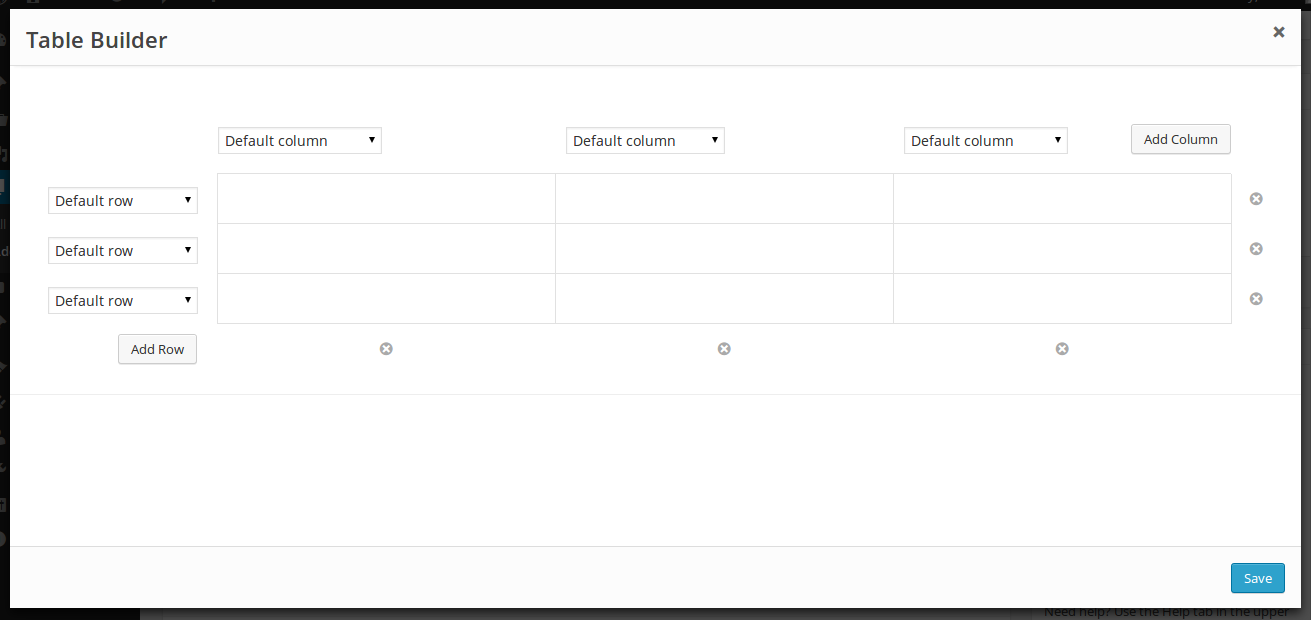
framework-customizations/theme/shortcodes/table-builder/with the custom option type:<?php if (!defined('FW')) die('Forbidden'); $options = array( 'table' => array( 'type' => 'table-builder', 'label' => false, 'desc' => false, ) );Note
At this point, when clicking the shortcode inside the canvas area of the layout builder a pop-up window containting the options will appear:
Create the view file in framework-customizations/theme/shortcodes/table-builder/views/ and make use of the custom option type value.
The [table_builder] shorcode is completed! The directory structure of the shortcode is as shown bellow:
framework-customizations/
└─theme/
  └─shortcodes/
    └─table-builder/
      ├─class-fw-shortcode-table-builder.php
      ├─config.php
      ├─options.php
      ├─views/
      │ └─view.php
      └─includes/
        └─fw-option-type-table-builder/
          ├─class-fw-option-type-table-builder.php
          ├─static/
          └─views/